
How to take excellent histopathology images
Author: Raul S. Gonzalez, M.D.
Revised: 5 April 2023
Copyright: 2023, PathologyOutlines.com, Inc.
Pathology is a visual specialty, and therefore in order to properly convey the appearance of the tissue, photomicrographs (photographic images of microscopic findings) should be as high-quality as possible. This guide is an overview to taking excellent histopathology images, for use on Pathology Outlines, in research publications, in lectures, on social media, etc. It is written from the point of view of a practicing pathologist, not a professional graphic designer or editor.
A microscope-mounted camera should be used whenever possible. If one is not available and you are using a cell phone to take pictures, refer to this guide for best results: Arch Pathol Lab Med 2014;138:1002.
Software settings for the camera should be optimized prior to talking pictures. Photos should ideally be as large as possible (since large photos can be shrunken with no loss in quality, but enlarging small photos is a bad idea) and saved in the appropriate format (TIF for professional images; JPG is probably fine for online posting). Photo resolution and aspect ratio can be set in software or edited later. Most modern photomicrographs should be set in a rectangular aspect ratio (such as 4:3 or 16:9). A square ratio (1:1) is rarely used nowadays.
If possible, the software should be set for flat field correction. This eliminates any vignetting caused by the central location of the light source, which manifests as darker or grayed areas along the periphery of the image, creating a rounded shape. This may require technical support with the software company for best results.
Clean the slide before taking photos, to remove any dust or debris. Paraffin wax may also be stuck on the slide and may require a little extra effort to remove.
When taking a photograph, make sure the image is IN FOCUS on the screen. This may take a little tweaking but is imperative for best results.

Once you have taken a clean, in-focus image, save it to your computer (making sure to select the correct file type). Now, it's time for some editing. Several free and paid programs are available; the next steps will be demonstrated using the free program GIMP (GNU Image Manipulation Program), but use whatever you are most comfortable with.
First, sharpen the image. This will offer additional improvement beyond taking an in-focus image (which is still important! Garbage in, garbage out). In GIMP, this is found by going to Filters > Enhance > Unsharp Mask. There are three variables, and you can play with settings to get your preferred result. I often use Radius 3, Amount 1, Threshold 0.

Next, white-balance the image. In GIMP, this is found by going to Colors > Levels, then clicking on the white eyedropper icon (to the right of the black and gray eyedropper icons). Once this is selected, click on an area of the photo that you want to be “true white” (this could be the background empty space, the lumen of a blood vessel, etc.). If you have NOT used flat field correction in your image, there is a higher chance that clicking different shades of gray-white in the image will cause different changes to the overall colors; when in doubt, consider clicking on a gray-white area toward the center of the image.
That covers the basics! Here is a direct side-by-side before and after editing in GIMP:
If there are artifacts (dust, keratin flakes, etc.) that you would like to remove manually, this can be done in almost any photo-editing software, from Photoshop to GIMP to Microsoft Paint. It should go without saying, but DO NOT edit your photo to try and change the pathologic findings depicted. This should only be done to clean up minor untidy artifacts.
Other edits you may need to make include arrows (to indicate certain findings), adding a second image as an inset, or collecting several images into a collage. These can be done in GIMP and other photo-editing software programs.
If you are submitting to a journal, you will need to make sure the image file is in the correct DPI (check the specific journal's requirements). This can be done in almost any photo-editing software.
Author: Raul S. Gonzalez, M.D.
Revised: 5 April 2023
Copyright: 2023, PathologyOutlines.com, Inc.
Pathology is a visual specialty, and therefore in order to properly convey the appearance of the tissue, photomicrographs (photographic images of microscopic findings) should be as high-quality as possible. This guide is an overview to taking excellent histopathology images, for use on Pathology Outlines, in research publications, in lectures, on social media, etc. It is written from the point of view of a practicing pathologist, not a professional graphic designer or editor.
A microscope-mounted camera should be used whenever possible. If one is not available and you are using a cell phone to take pictures, refer to this guide for best results: Arch Pathol Lab Med 2014;138:1002.
Software settings for the camera should be optimized prior to talking pictures. Photos should ideally be as large as possible (since large photos can be shrunken with no loss in quality, but enlarging small photos is a bad idea) and saved in the appropriate format (TIF for professional images; JPG is probably fine for online posting). Photo resolution and aspect ratio can be set in software or edited later. Most modern photomicrographs should be set in a rectangular aspect ratio (such as 4:3 or 16:9). A square ratio (1:1) is rarely used nowadays.
If possible, the software should be set for flat field correction. This eliminates any vignetting caused by the central location of the light source, which manifests as darker or grayed areas along the periphery of the image, creating a rounded shape. This may require technical support with the software company for best results.
No flat field correction
Flat field correction
Clean the slide before taking photos, to remove any dust or debris. Paraffin wax may also be stuck on the slide and may require a little extra effort to remove.
Slide not quite clean
Slide clean
When taking a photograph, make sure the image is IN FOCUS on the screen. This may take a little tweaking but is imperative for best results.
Image not quite in focus
Image in focus
Image not quite in focus
Image in focus
Once you have taken a clean, in-focus image, save it to your computer (making sure to select the correct file type). Now, it's time for some editing. Several free and paid programs are available; the next steps will be demonstrated using the free program GIMP (GNU Image Manipulation Program), but use whatever you are most comfortable with.
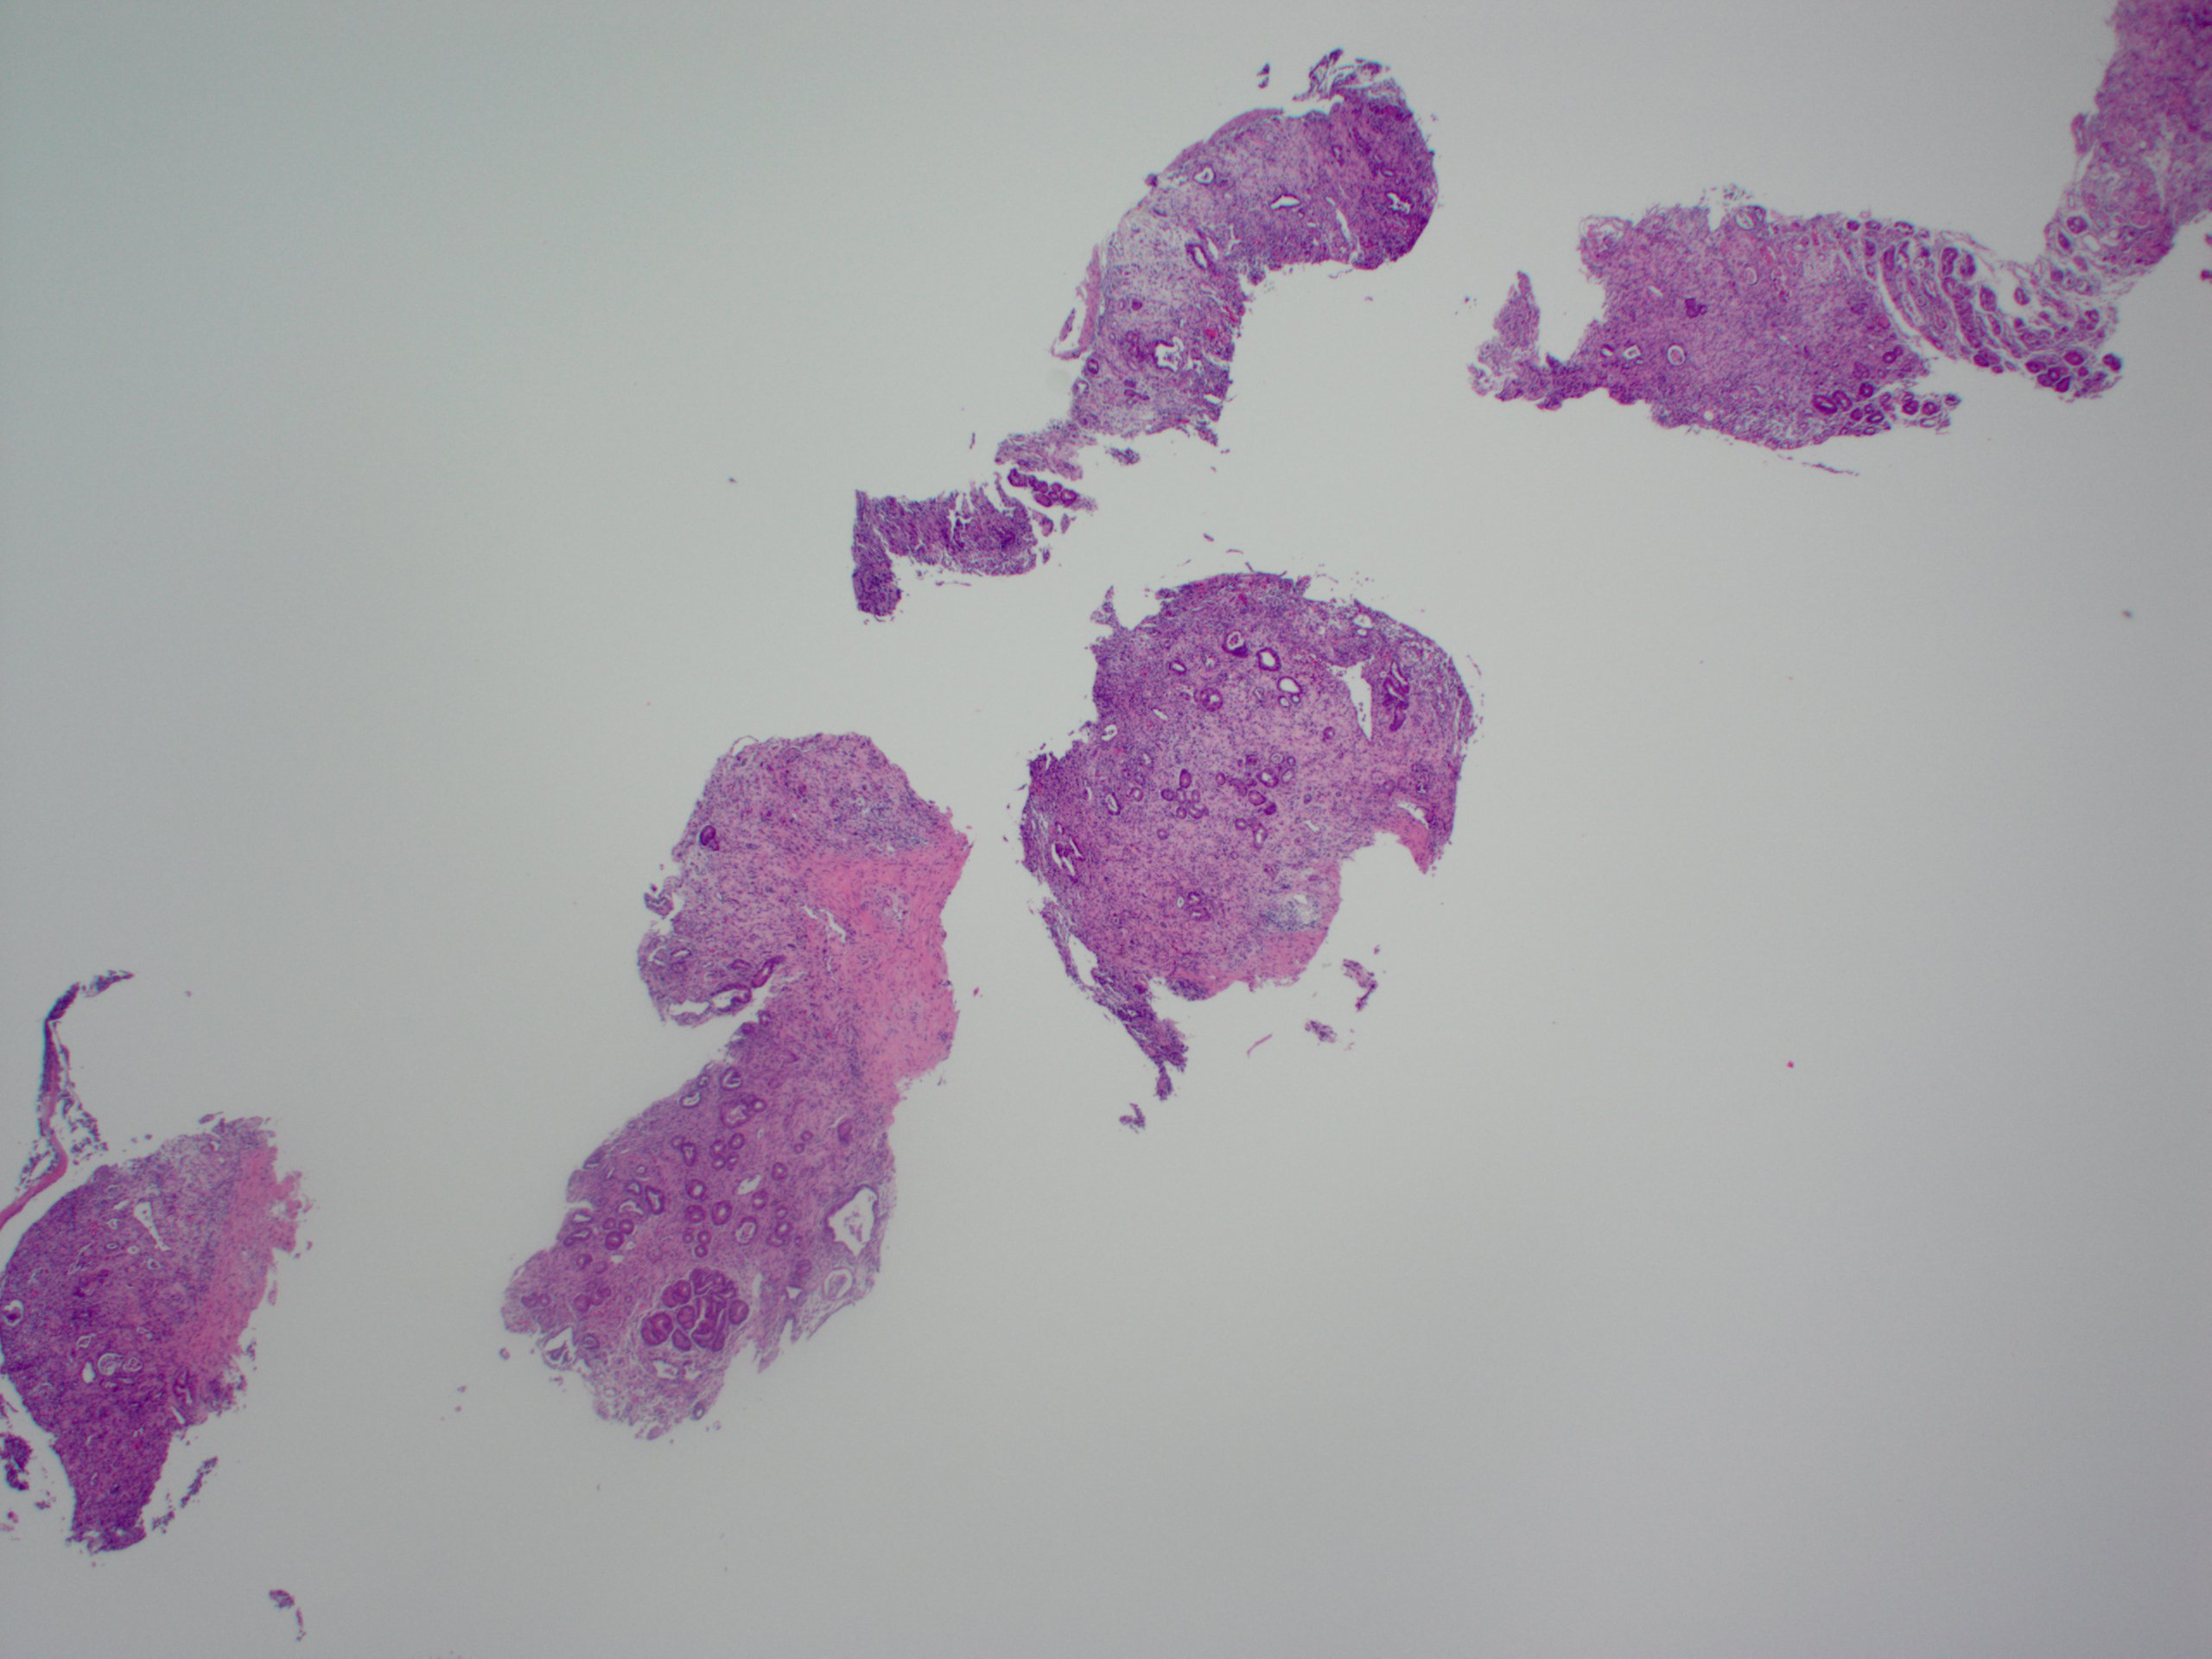
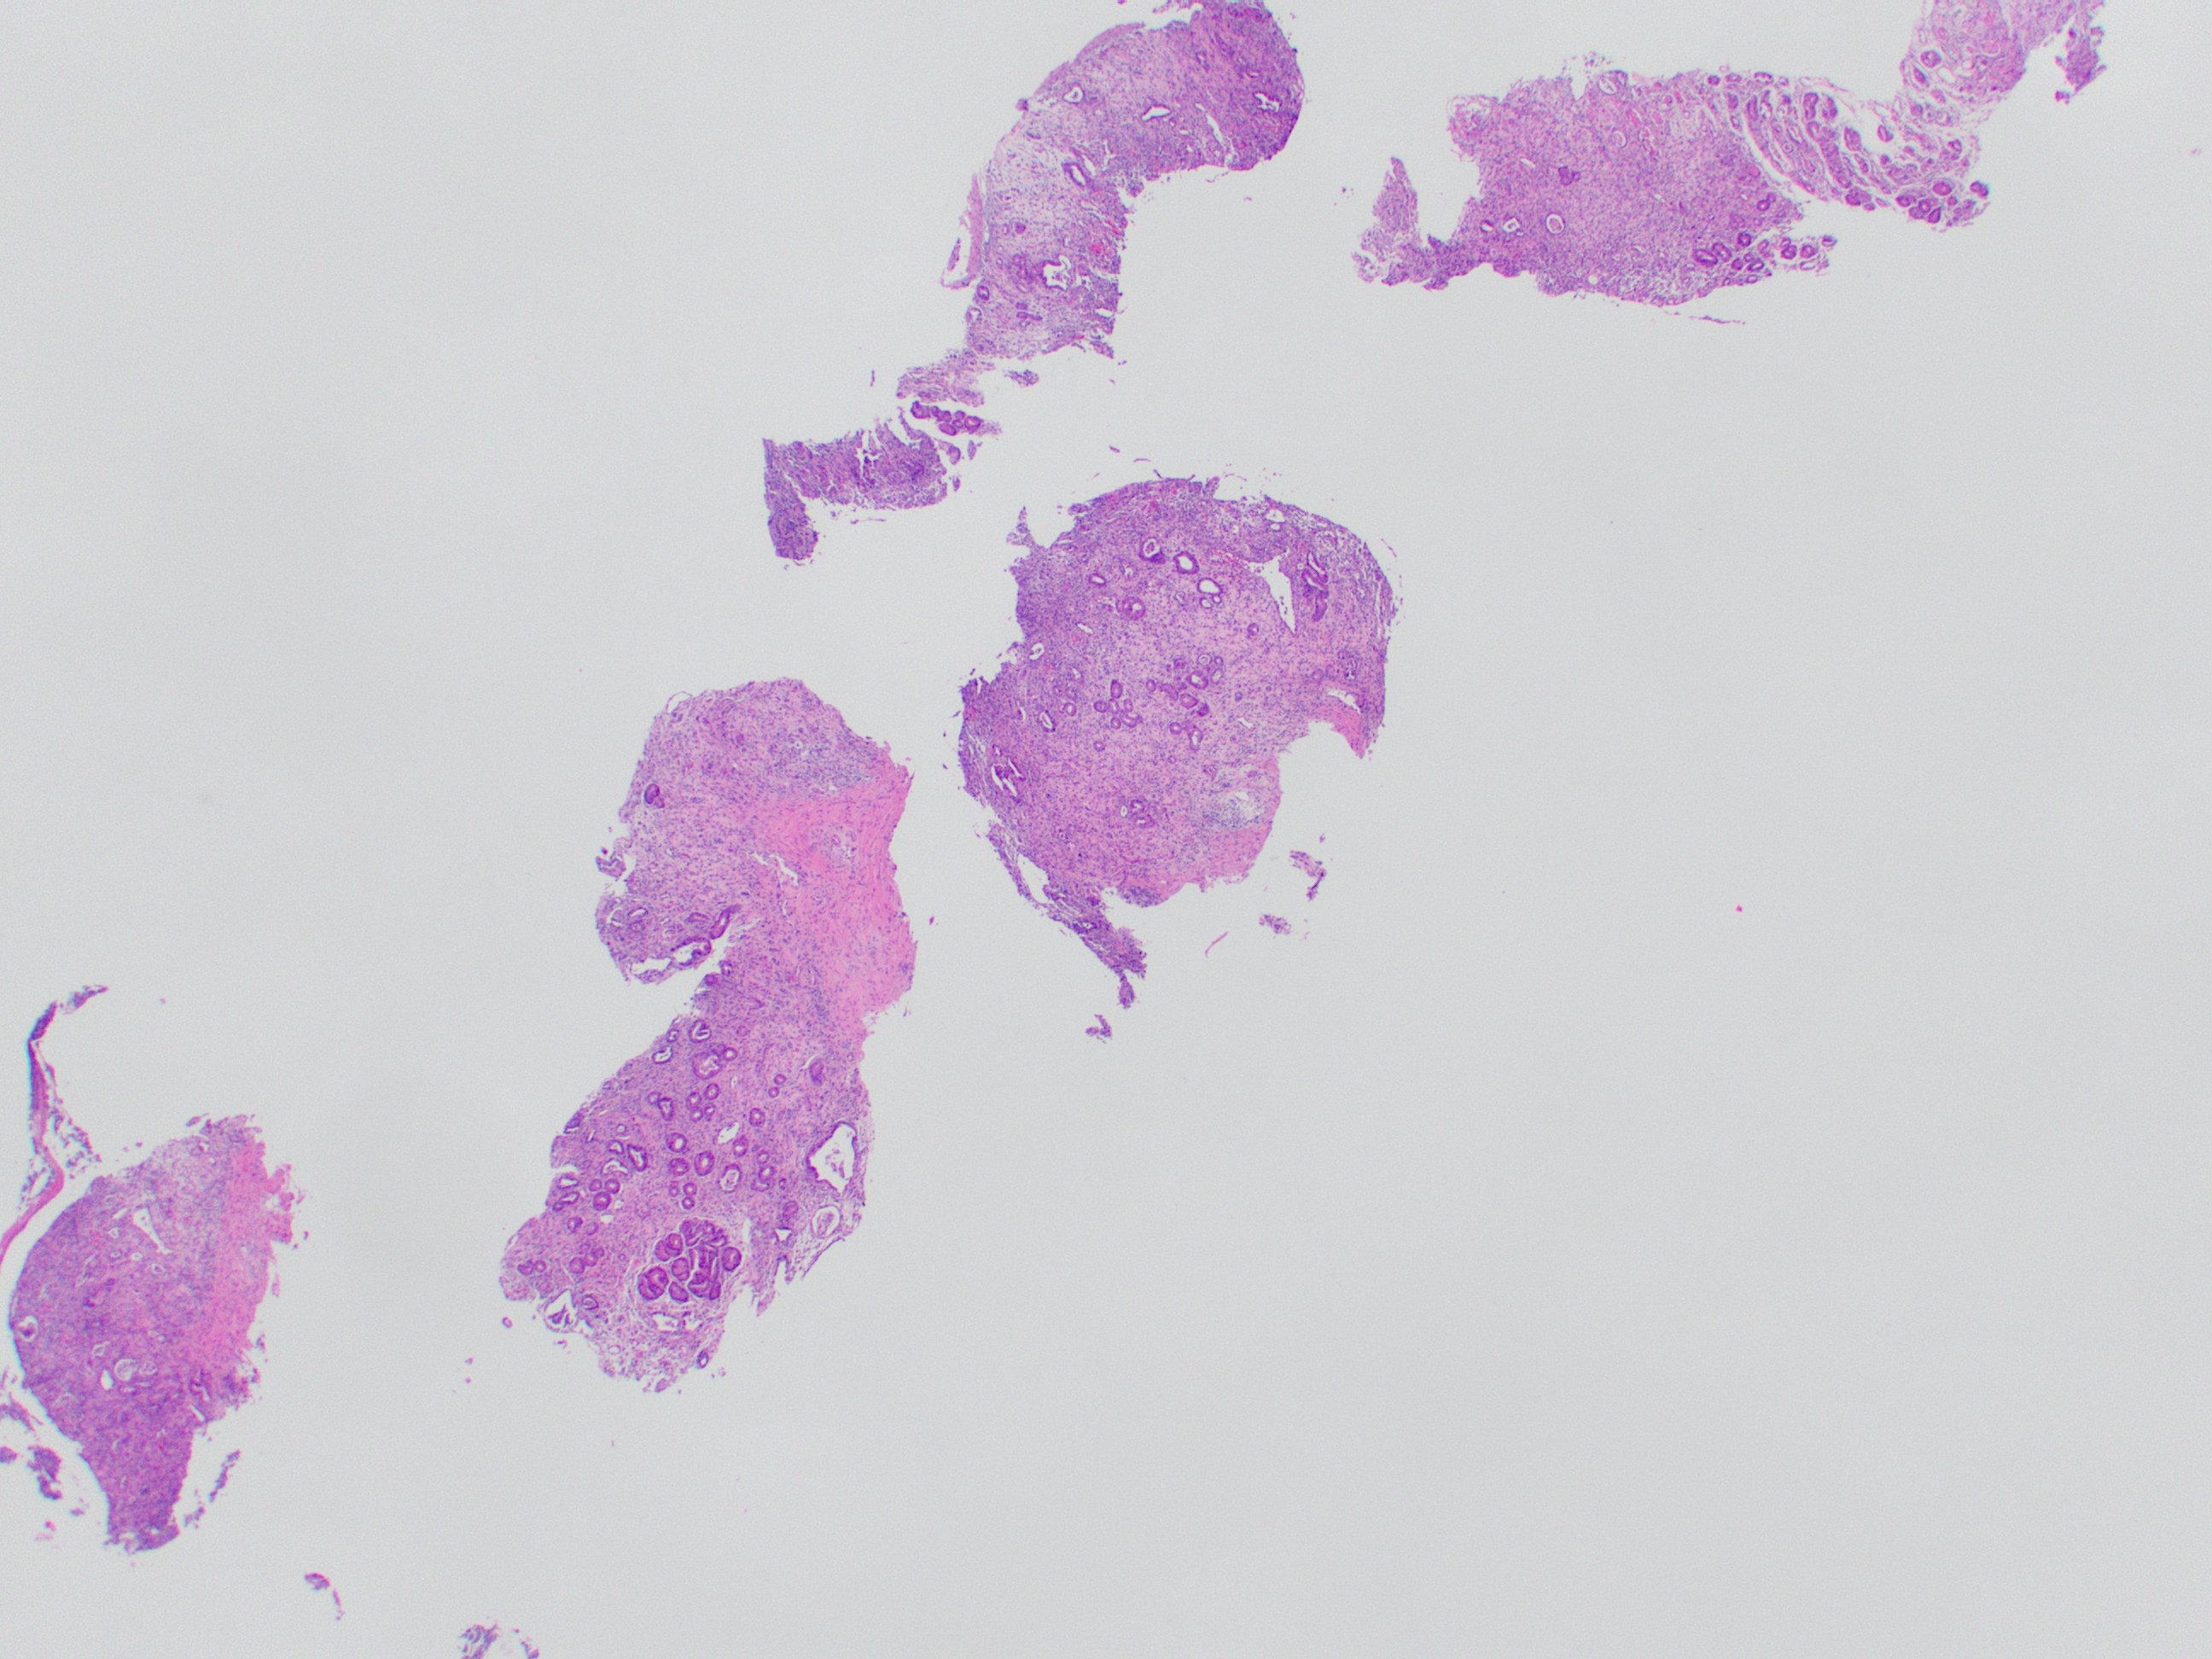
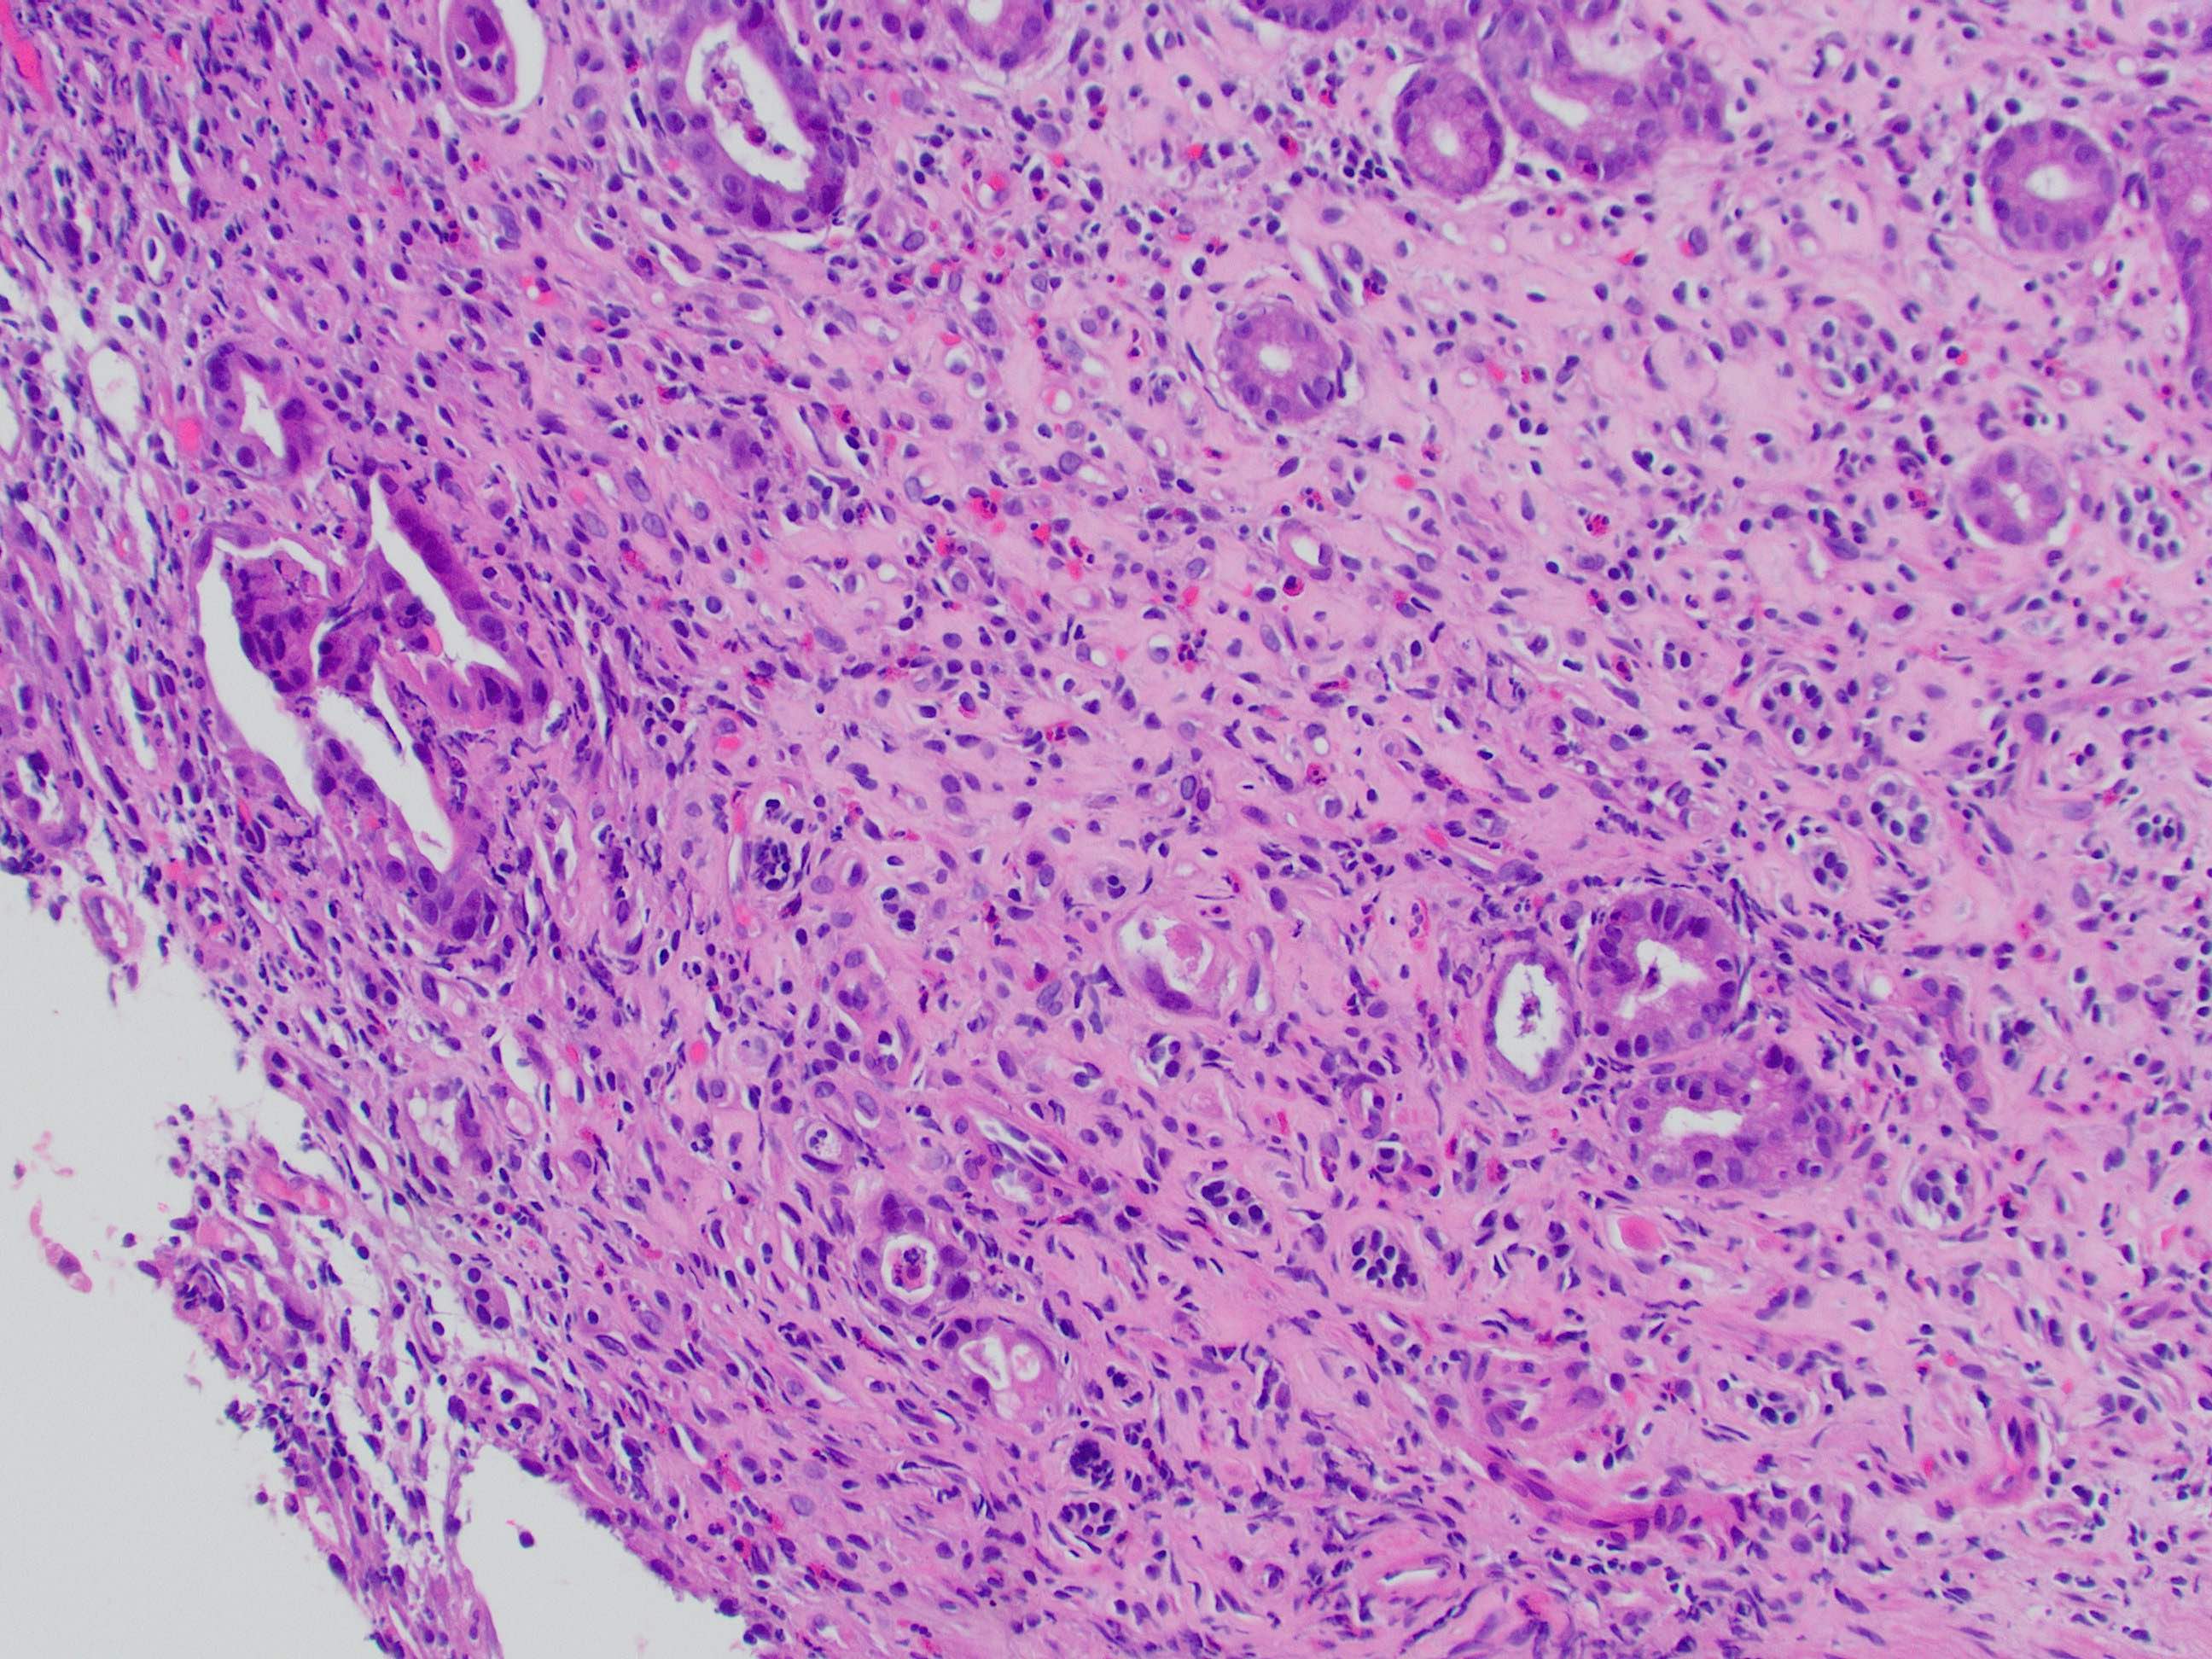
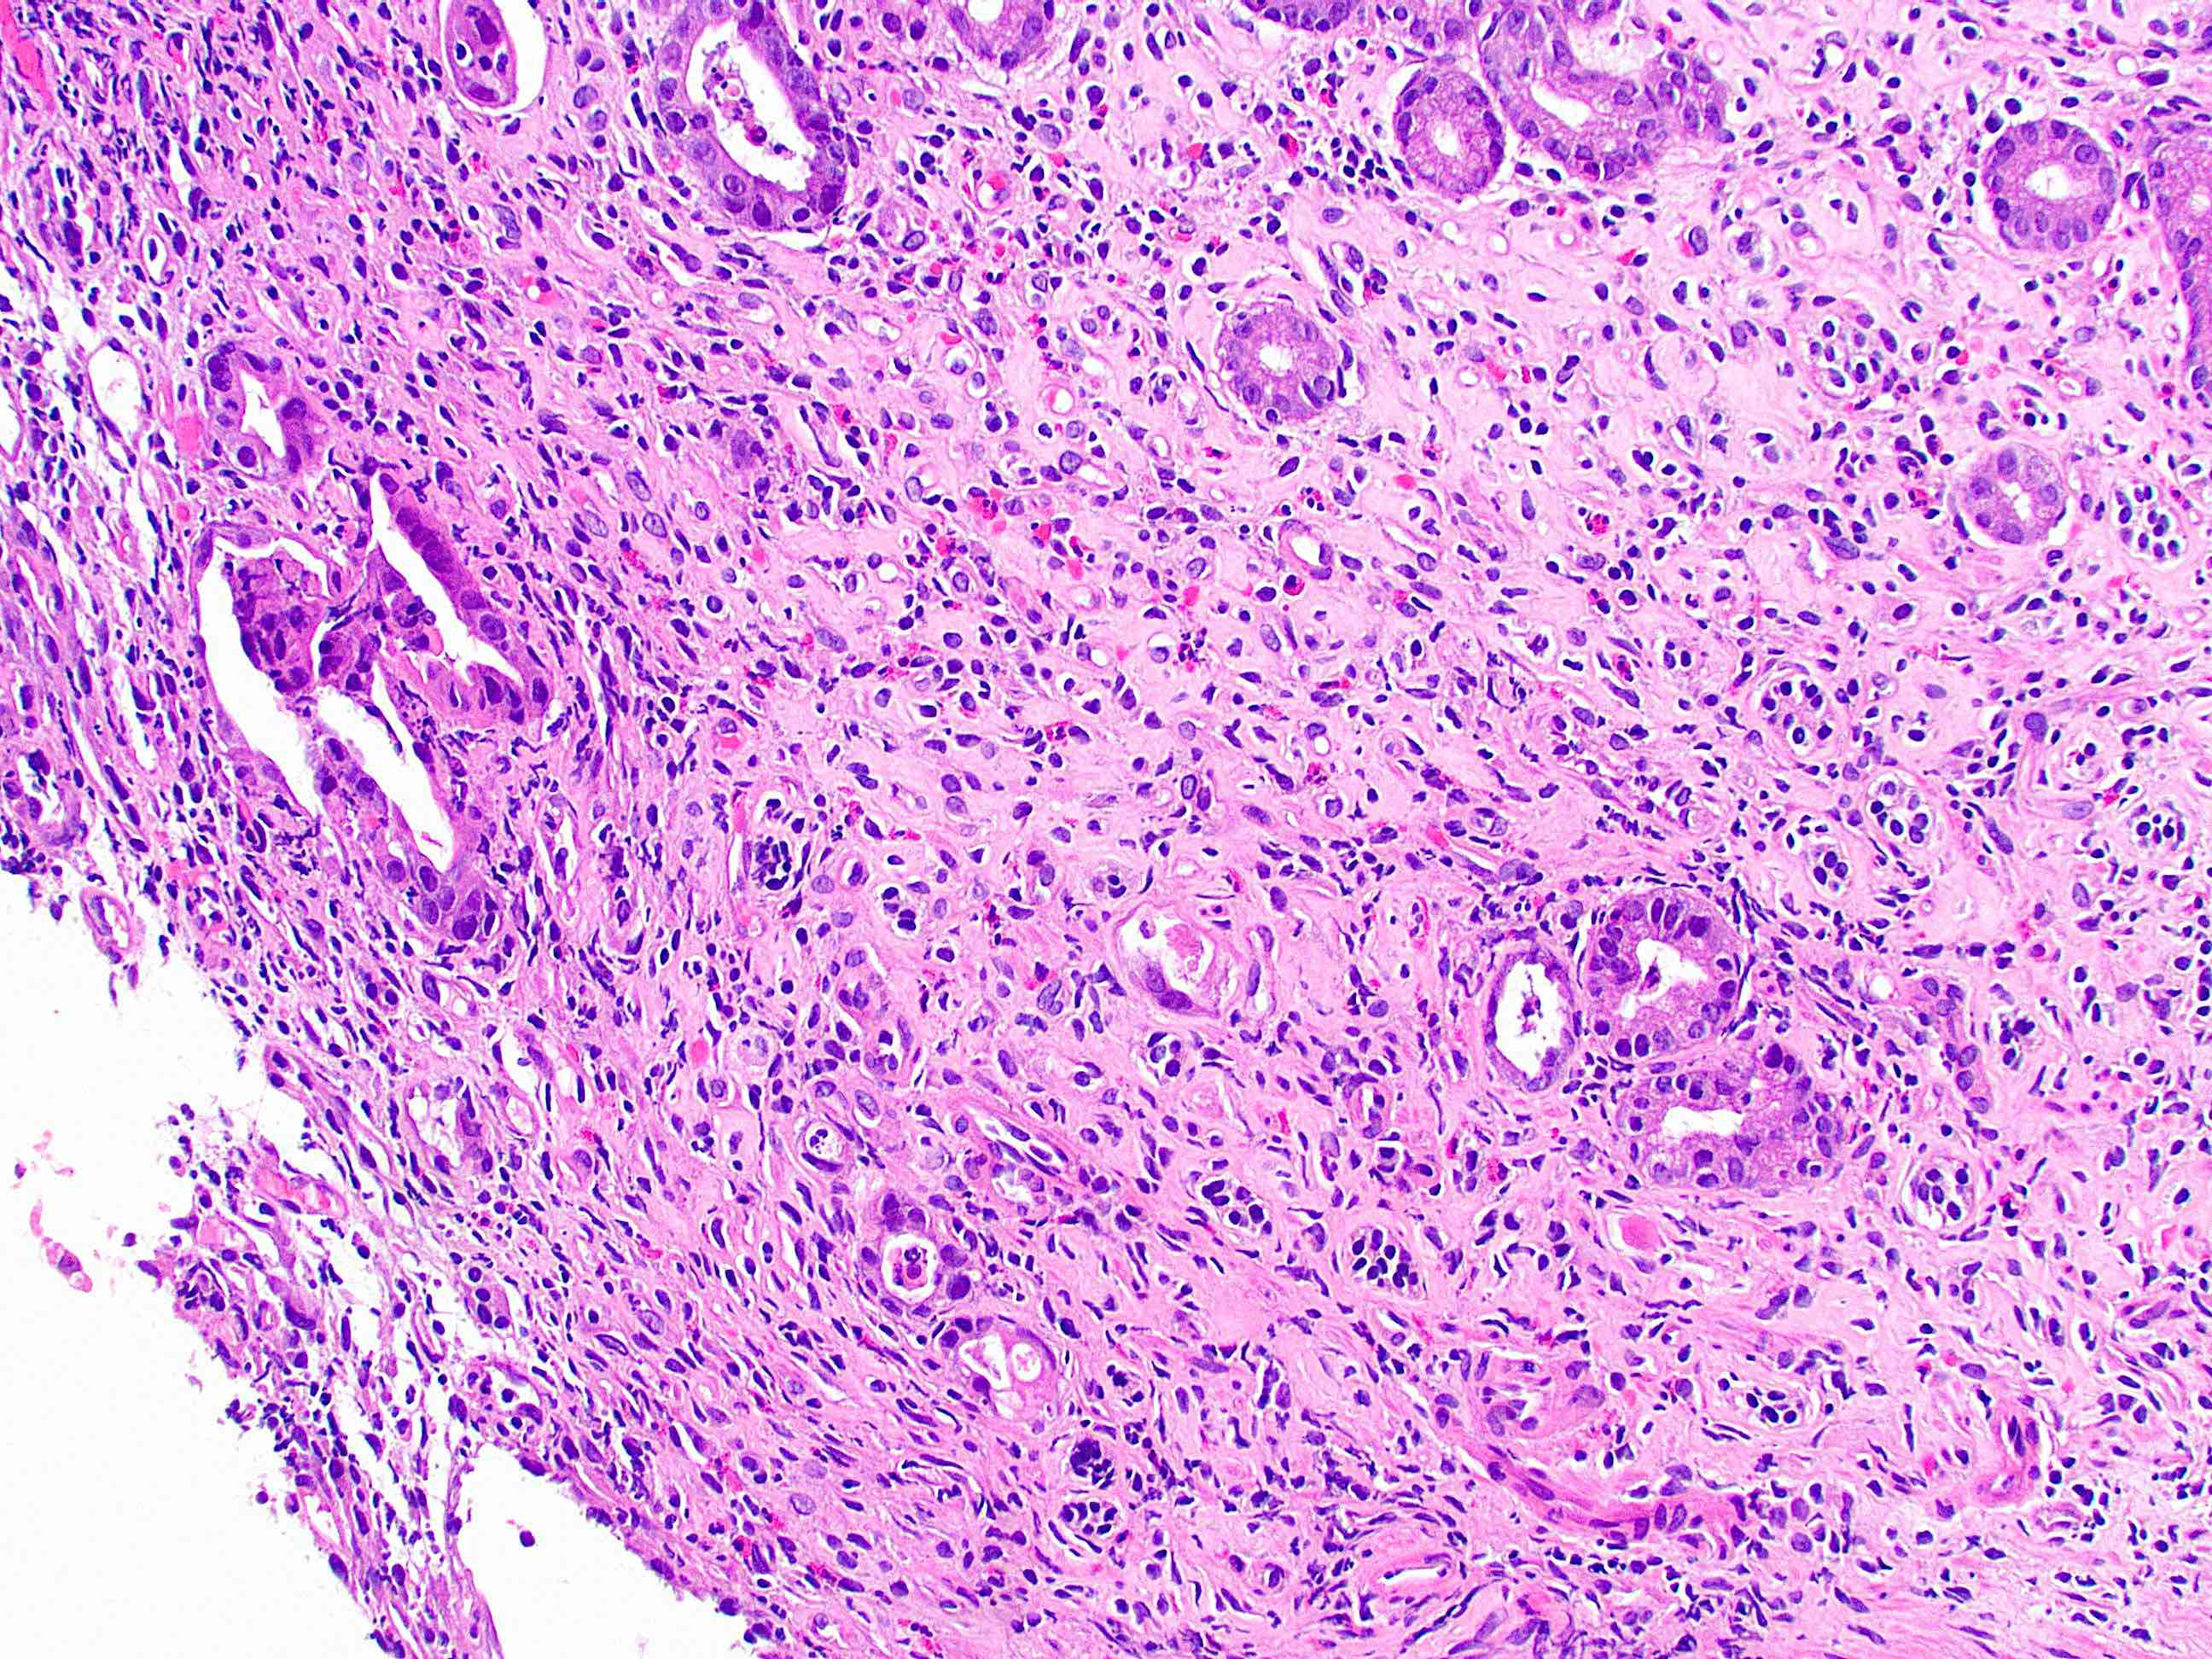
First, sharpen the image. This will offer additional improvement beyond taking an in-focus image (which is still important! Garbage in, garbage out). In GIMP, this is found by going to Filters > Enhance > Unsharp Mask. There are three variables, and you can play with settings to get your preferred result. I often use Radius 3, Amount 1, Threshold 0.
Before sharpening
After sharpening
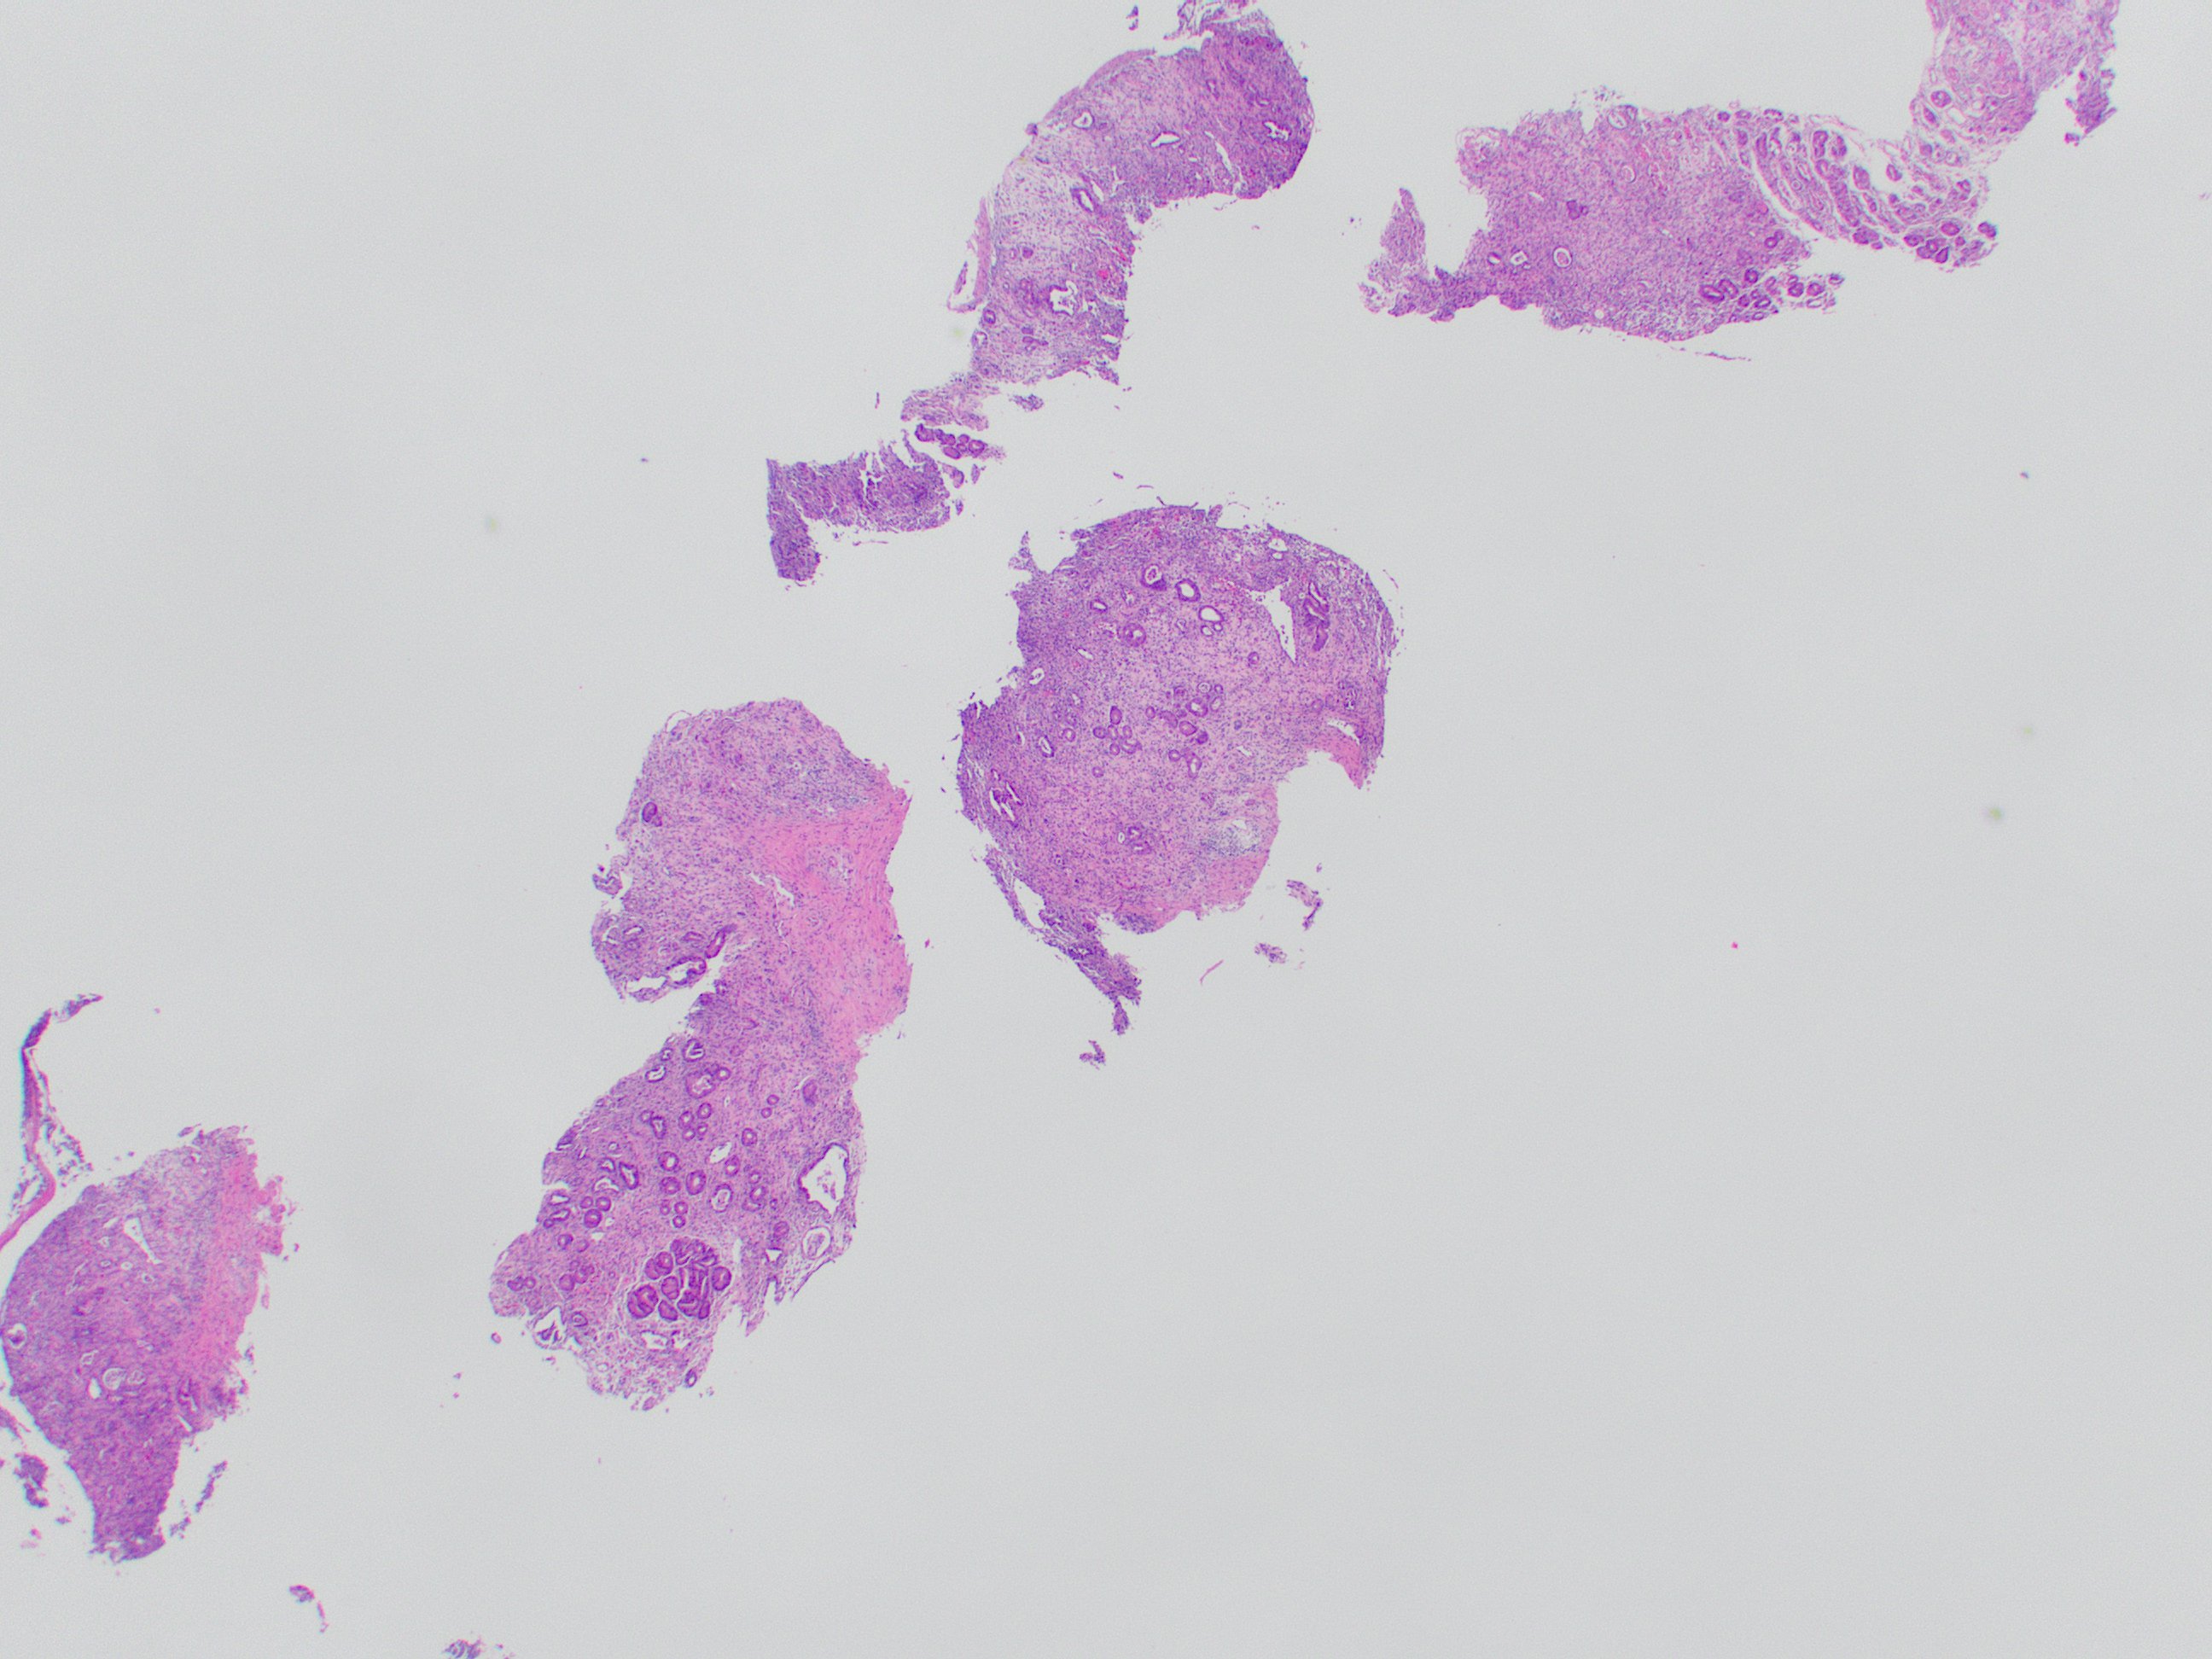
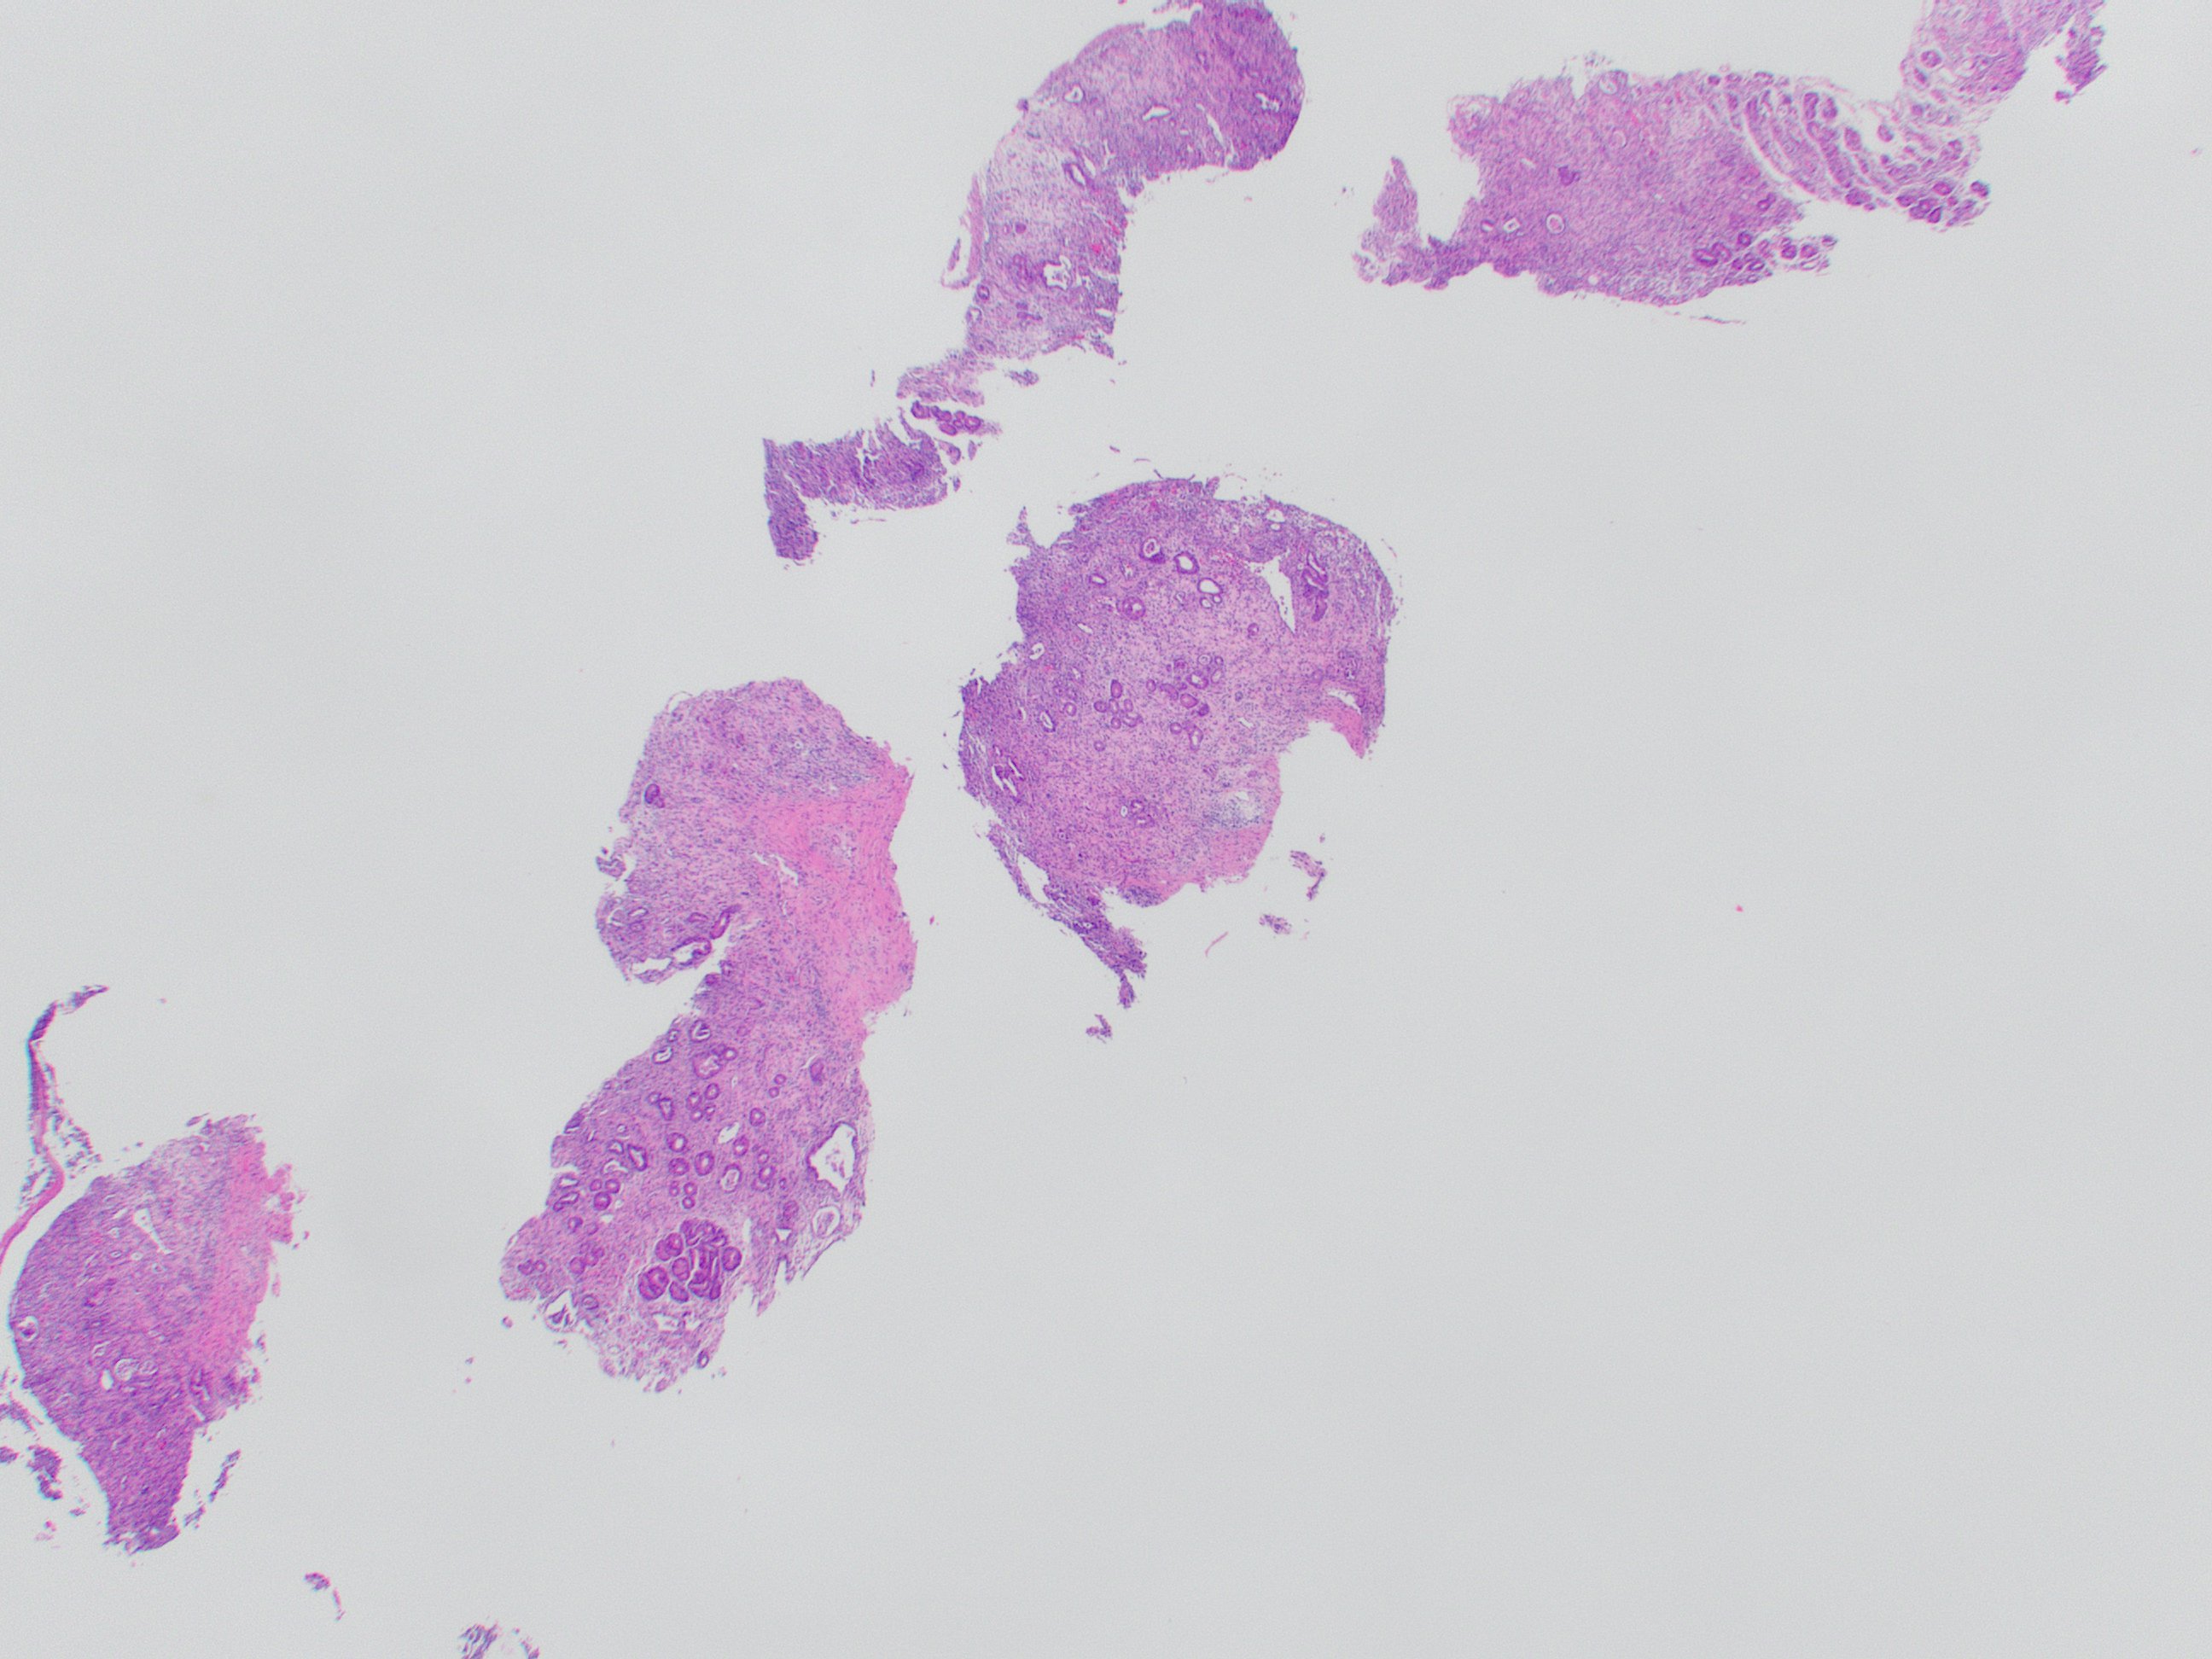
Next, white-balance the image. In GIMP, this is found by going to Colors > Levels, then clicking on the white eyedropper icon (to the right of the black and gray eyedropper icons). Once this is selected, click on an area of the photo that you want to be “true white” (this could be the background empty space, the lumen of a blood vessel, etc.). If you have NOT used flat field correction in your image, there is a higher chance that clicking different shades of gray-white in the image will cause different changes to the overall colors; when in doubt, consider clicking on a gray-white area toward the center of the image.
Before white-balance
After white-balance
That covers the basics! Here is a direct side-by-side before and after editing in GIMP:
Before editing
After editing
If there are artifacts (dust, keratin flakes, etc.) that you would like to remove manually, this can be done in almost any photo-editing software, from Photoshop to GIMP to Microsoft Paint. It should go without saying, but DO NOT edit your photo to try and change the pathologic findings depicted. This should only be done to clean up minor untidy artifacts.
Other edits you may need to make include arrows (to indicate certain findings), adding a second image as an inset, or collecting several images into a collage. These can be done in GIMP and other photo-editing software programs.
If you are submitting to a journal, you will need to make sure the image file is in the correct DPI (check the specific journal's requirements). This can be done in almost any photo-editing software.
